IntelliJ IDEA IDE Setup
IntelliJ IDEA is the IDE that the authors of React4j use and recommend but any IDE should work fine. It is however the only IDE that the authors have experience with when tuning the configuration.
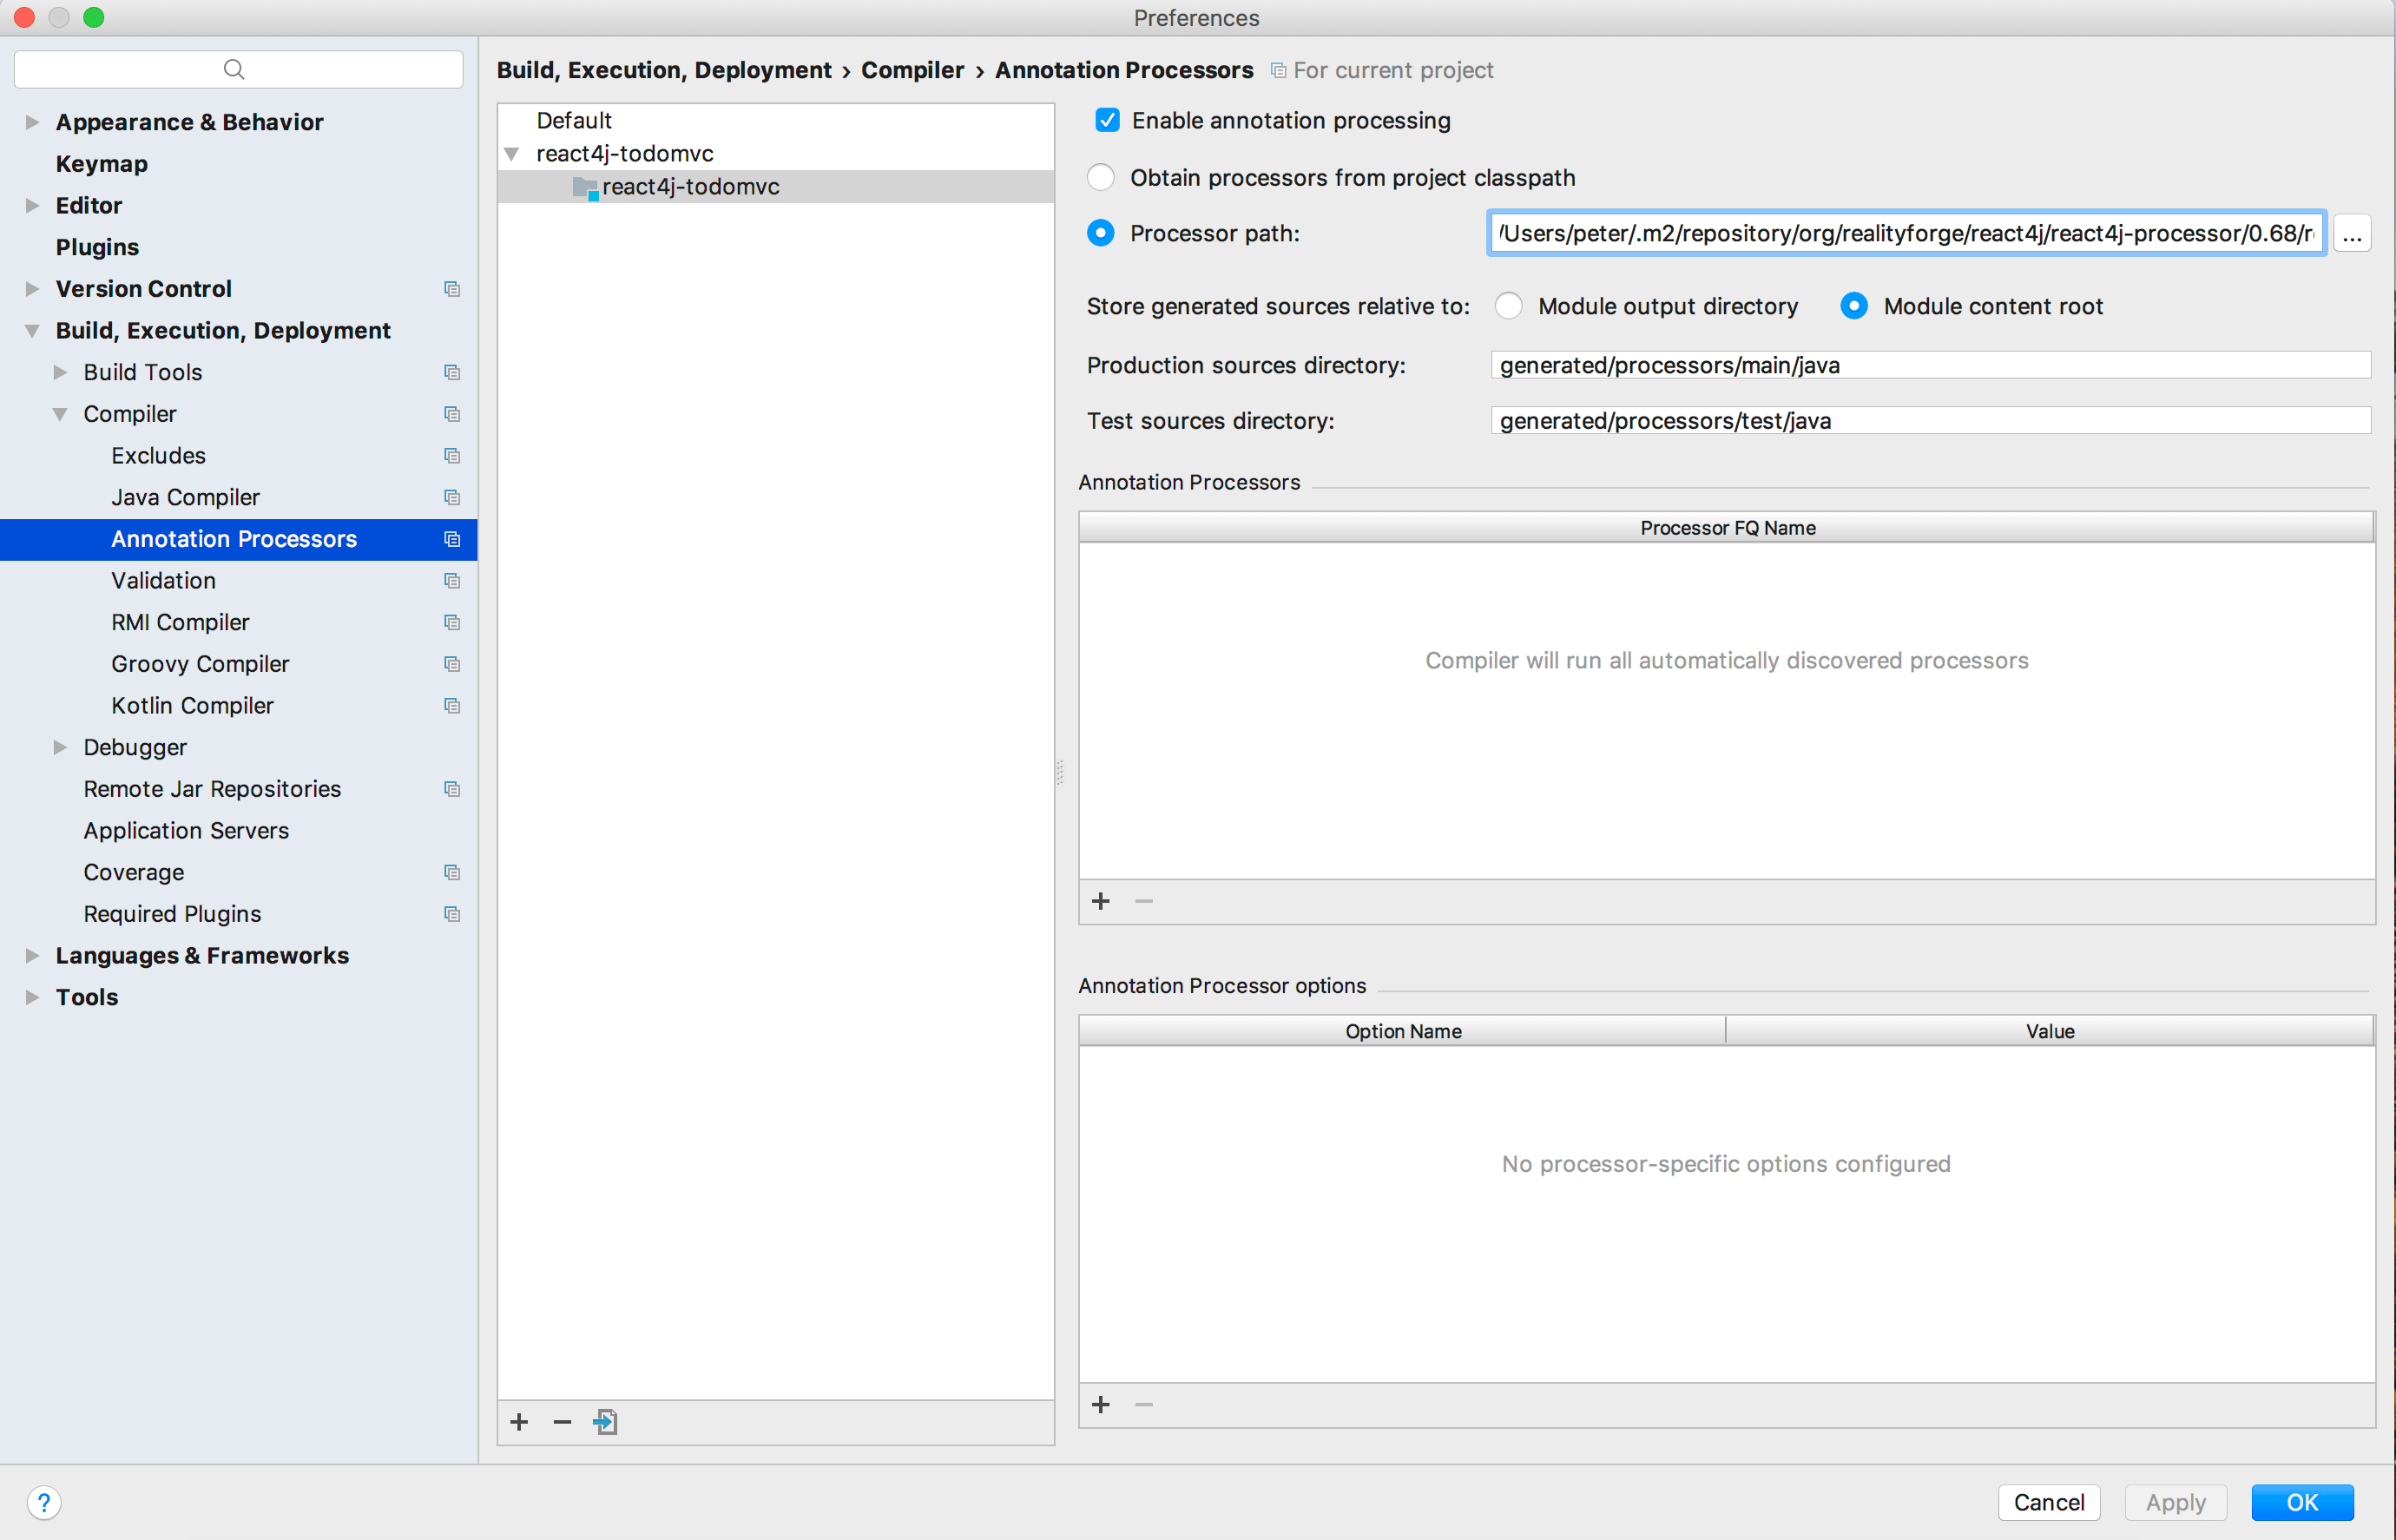
Configure the Annotation Processors
IntelliJ IDEA 2017.2 does not correctly setup annotation processors when importing a pom.xml if the
annotation processor jar is not also present on the compile path. So it is necessary to manually configure
the annotation processors.
This involves opening up the Settings or Preferences dialog which is accessed through the
menu IntelliJ IDEA -> Preferences under Mac OSX or File -> Settings under Linux and Windows.
Then go to Build, Execution, Deployment -> Compiler -> Annotation Processors and configure
the Processor Path to include the path to the annotation processor jar.

Enable Auto Build
If your project is small enough or your processor is fast enough it is also useful to enable
automatic annotation processing. As before you can open up the preferences dialog and go to
Build, Execution, Deployment -> Compiler and enable "Make project automatically". And then
open the Action window:
- Linux:
CTRL+SHIFT+A - MacOS:
SHIFT+COMMAND+A - Windows:
CTRL+ALT+SHIFT+/
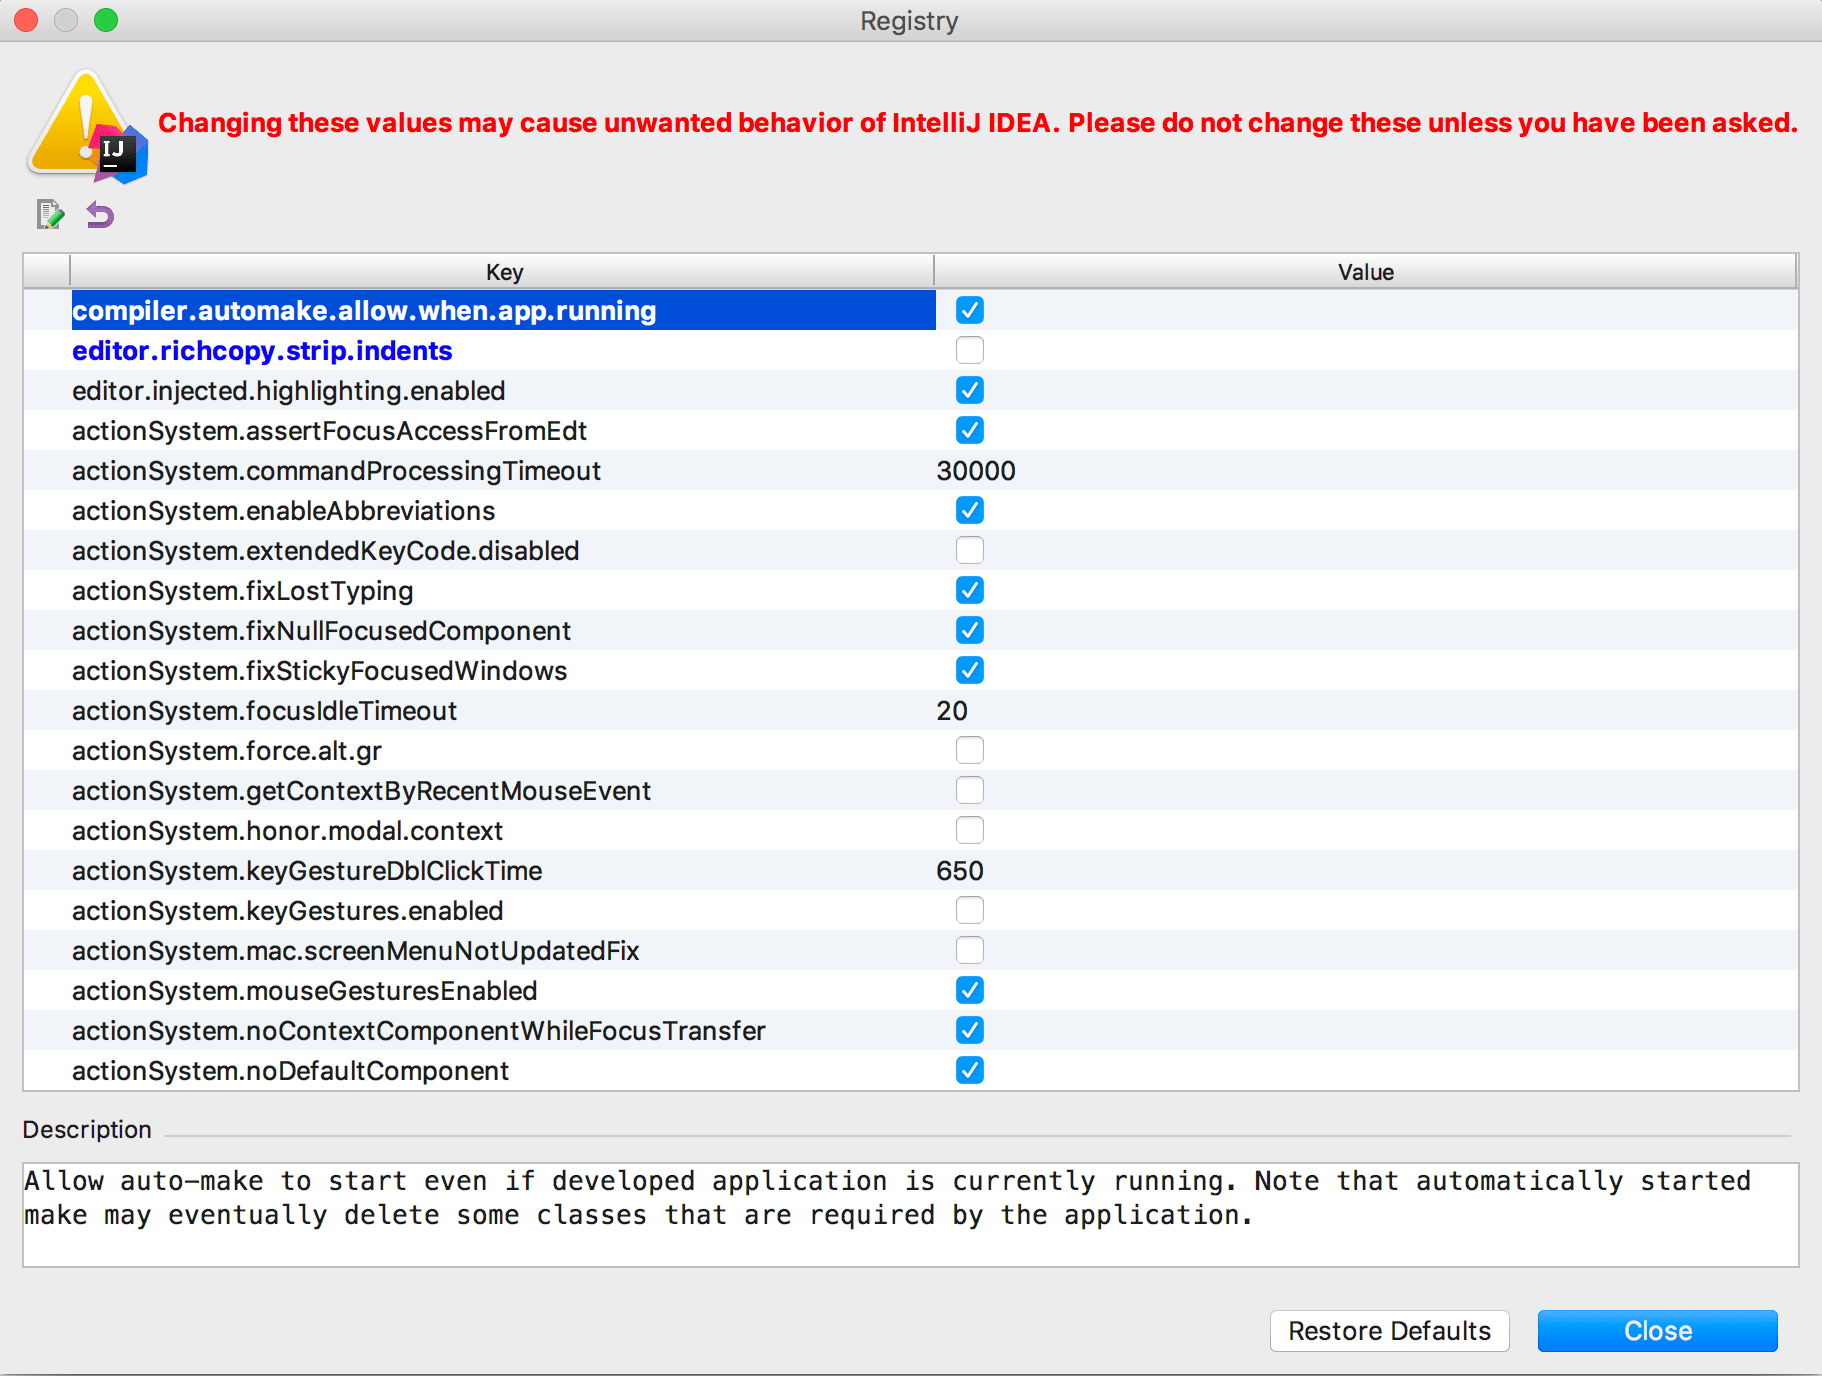
Enter Registry... and enable compiler.automake.allow.when.app.running.

Add Generated Source to Path
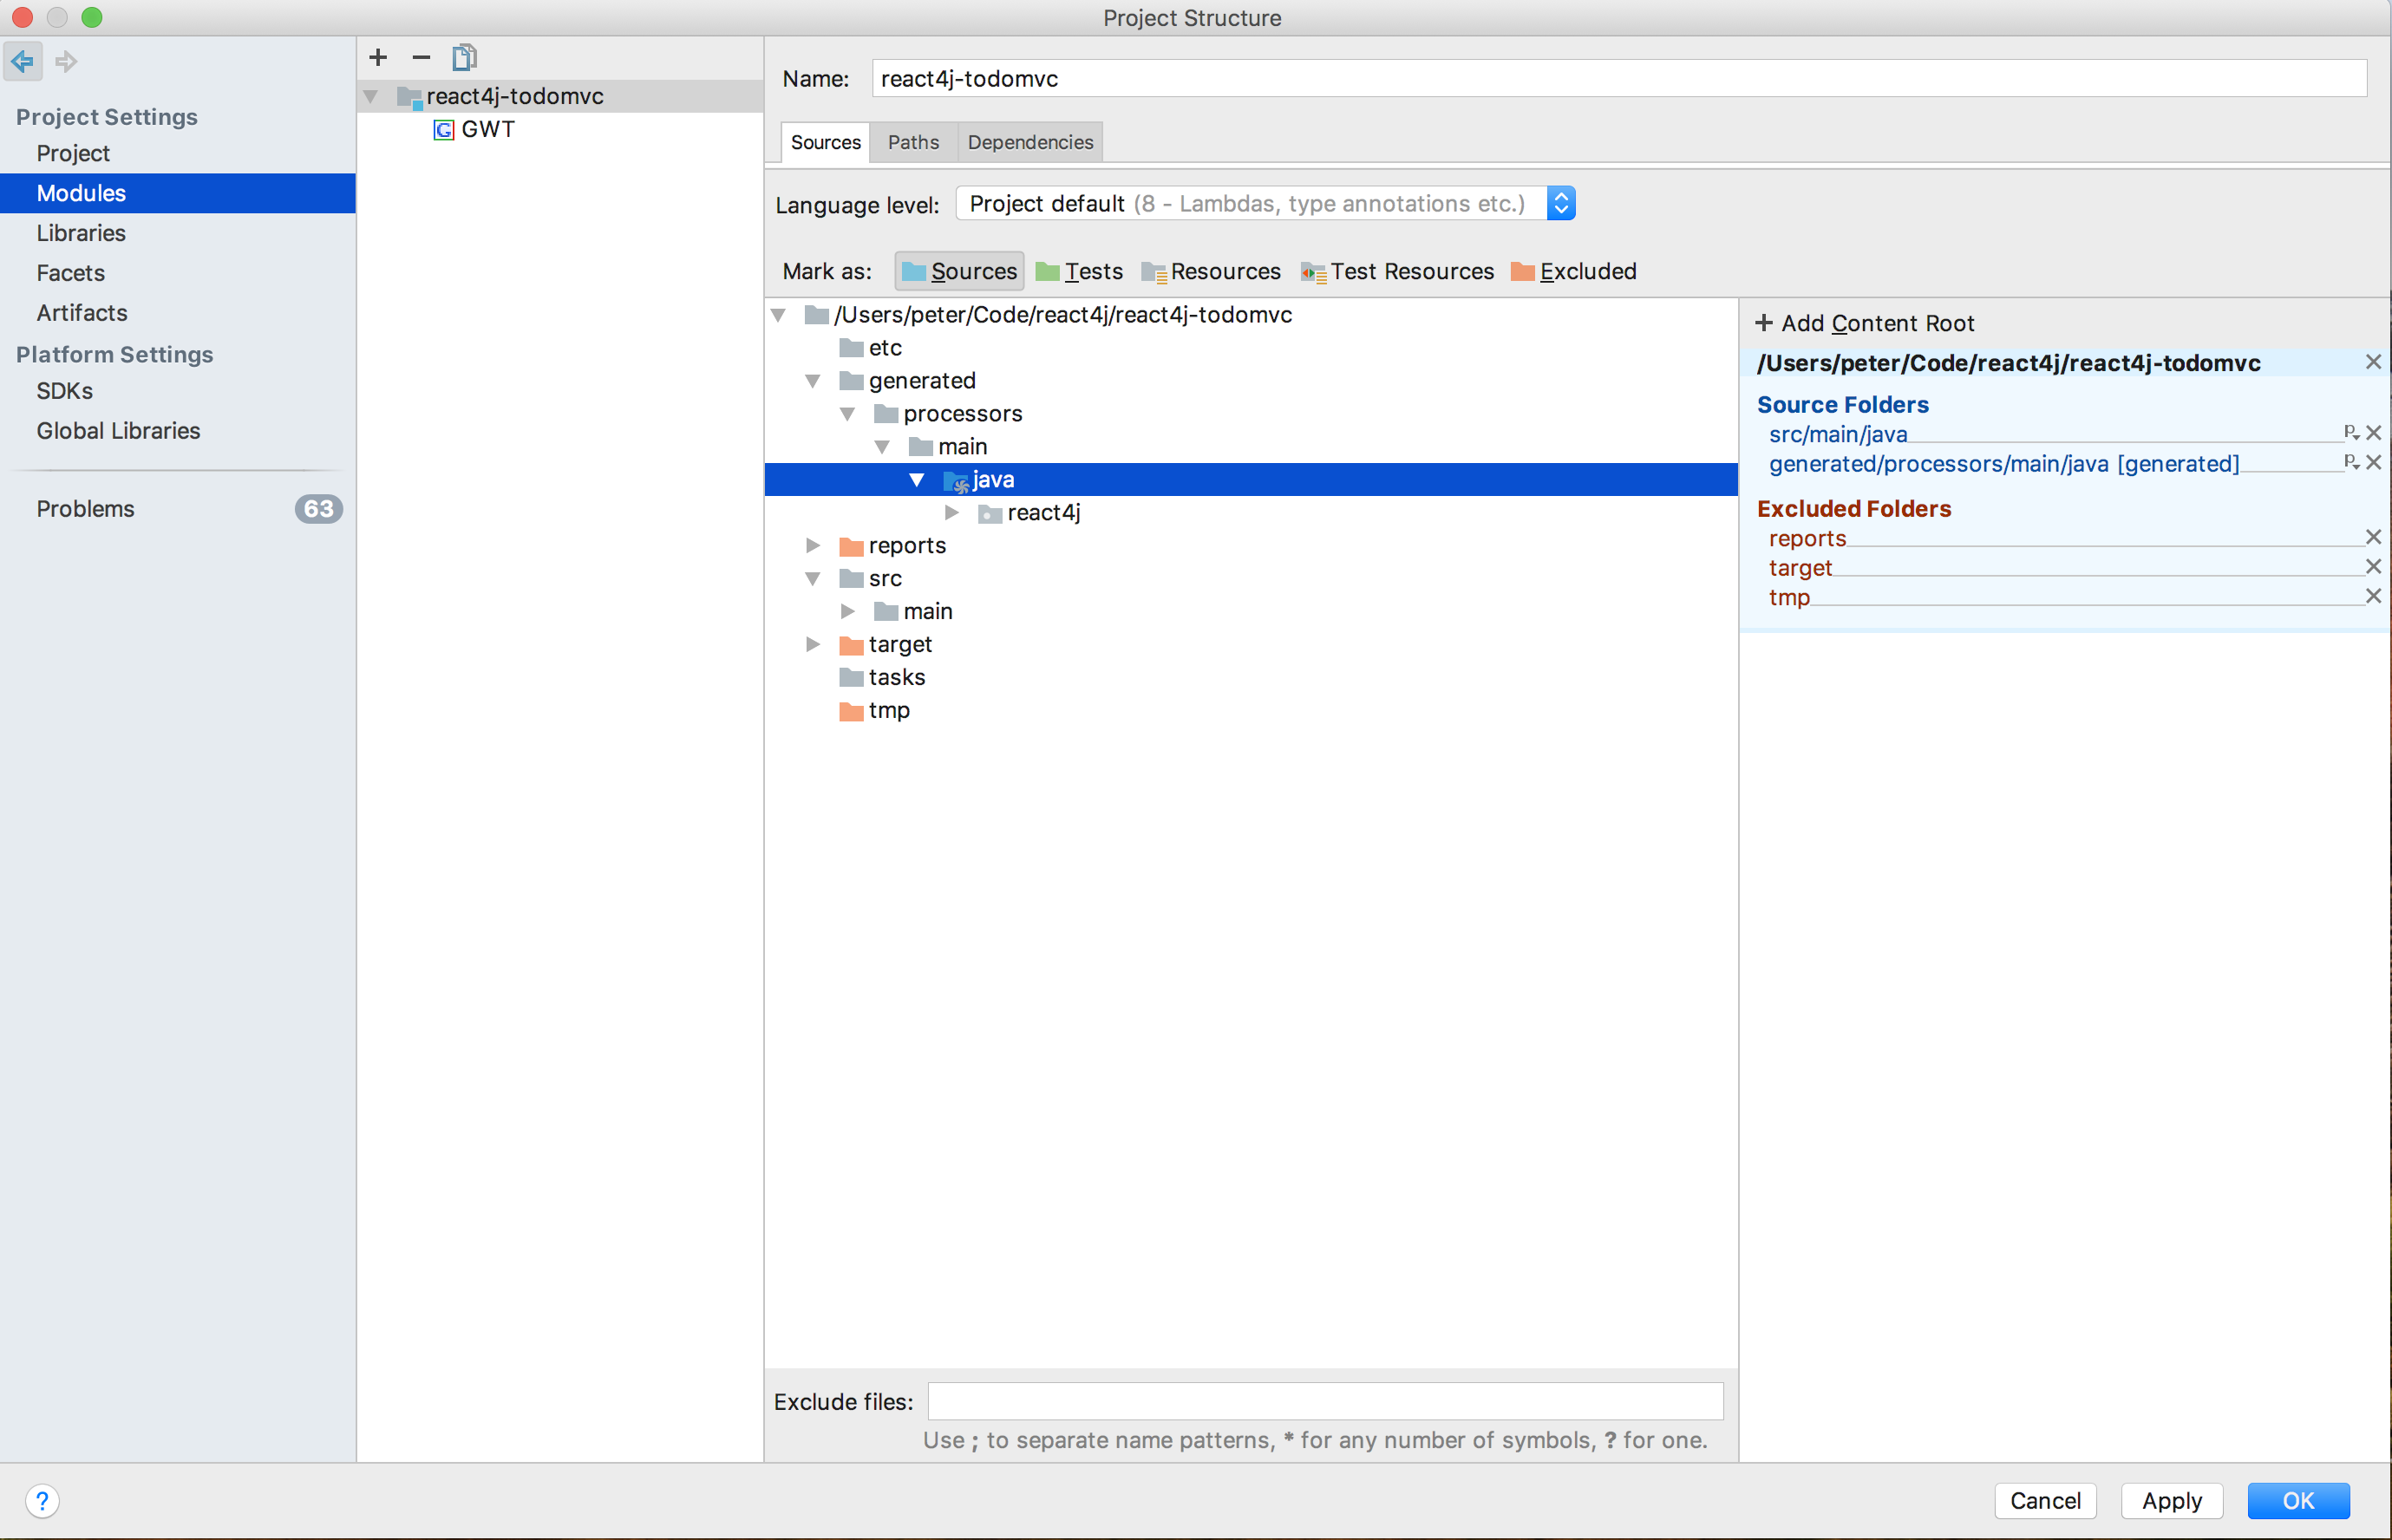
The React4j annotation processors generate source code and it is useful to tell the IDE to add this source
code to each module. After this is done the IDE will allow auto completion and enable intellisense
for the generated code which can be a significant development aid. To do this go to
File -> Project Structure -> Module -> [MyModule] -> Sources and add the generated directory as Sources.

Note: You will receive a warning when the project compiles that this directory was excluded but do not worry as that is what we expect and want.
